Photo editing is a necessary aspect of the photographic process. Image masking can help you quickly isolate a subject or make selected modifications to transform a mundane photograph into something more engaging.
I’ll show you how to do many forms of picture masking in Photoshop and Lightroom in this guide.
These aren’t the only image editing tools that include picture masking capabilities, but they all work in a similar way. Let’s get started!
What is Image Masking?
The process of modifying or deleting a picture background is known as “image masking”. Photo editors utilize a variety of masking techniques. To remove an image from its original background and replace it with a new one.
Furthermore, a model may be photographed against an unfavorable backdrop. The publisher may request that the background be modified if the photographs are to be used for advertising. As a result, to isolate the backdrop, one must utilize an image masking process. The picture editing procedure can be utilized if the photos need to be modified.

In picture editing, what are masks used for?
In photo editing, image masking is really important. Masking an image is a vast activity. This vast activity can be summarized as below:
- Combining many pictures in a photo
- Using selective modifications to hide all or part of a layer
- Creating cut-outs (removing backgrounds)
- Working without causing harm
- Transparencies are added.
Types Of Image Masking Techniques on Photoshop
Here in this article, we will give a brief description of how to do image masking on photoshop. Because photoshop is really a great photo editing software. If you learn how to mask an image on photoshop then it will be easier to do it on other software as the process is almost the same.
1. Mask the layer in an Image
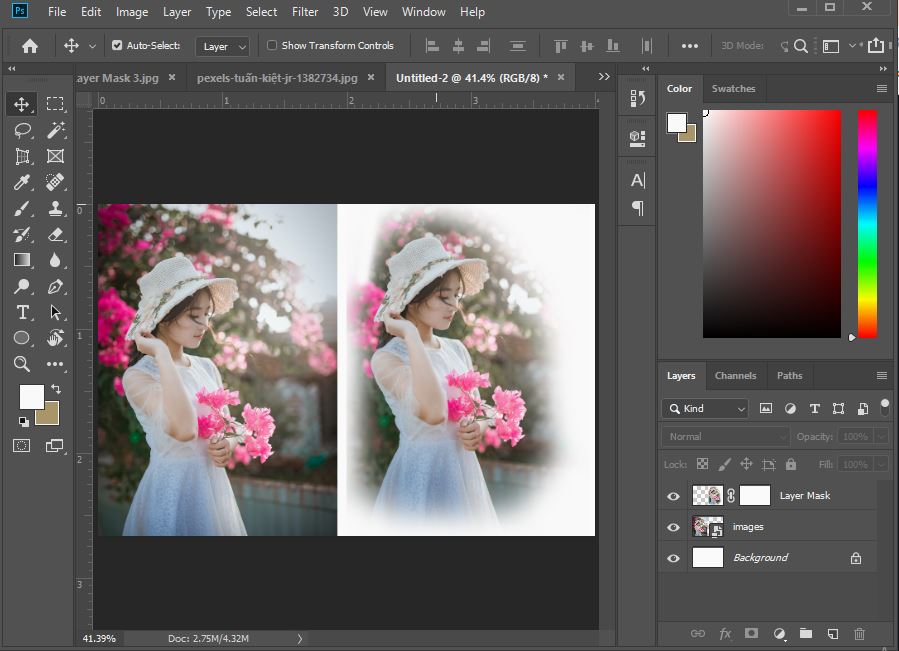
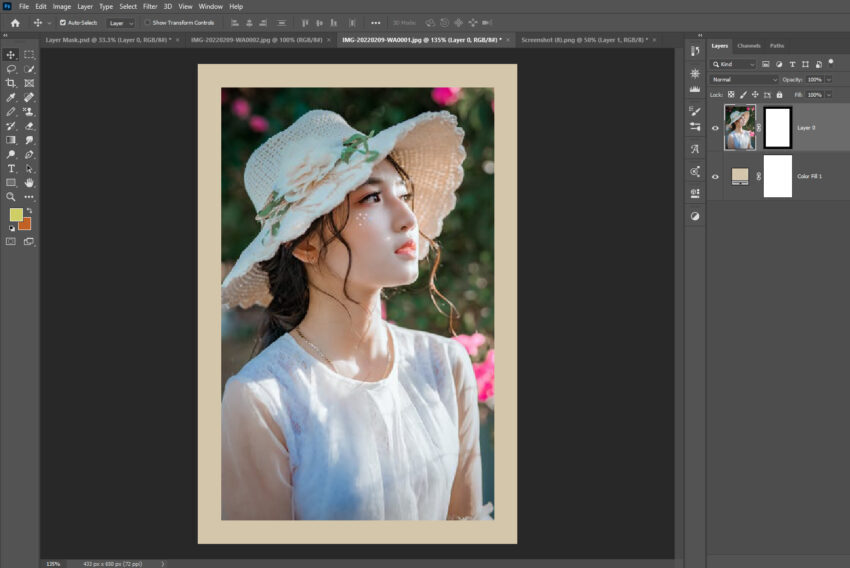
In Photoshop, this is the most widely used masking technique. Everything in white on a layer mask is visible, everything in black is hidden, and the greyscale provides you with multiple levels of transparency.
If you’re working on a single layer, the sections of the mask that aren’t visible will disclose the checkered pattern, indicating that there are no data. If you’ve ever opened a cut-out — a photo without a background – you’ll know what I’m talking about.
If there is another layer beneath the black area, it is revealed. The gray tones will add transparency to the layer, blending the two photos together.
Process of Mask layer in Image Masking:
- Choose the two photos you wish to mask and divide them into two layers.
- In the Layers panel, select a layer and click the ‘Add layer mask’ button at the bottom. On the selected layer, a white layer mask thumbnail will emerge, displaying everything on the layer.
- Select the tree silhouette with the Magic Wand Tool by clicking on the tree layer. The selection should be shown by a dashed white line.
- The goal now is to replace the tree’s silhouette with an image of the soil, thus the layer with the mask must be hidden. To do so, click on the layer mask again and paint the selection black with the Paint Bucket Tool. *Make sure the color of the FOREGROUND is BLACK.
- Your first layer mask has been successfully applied! To keep the layers and layer mask for future editing, save the image in.psd or. tiff format.

2. Alpha Channel Masking
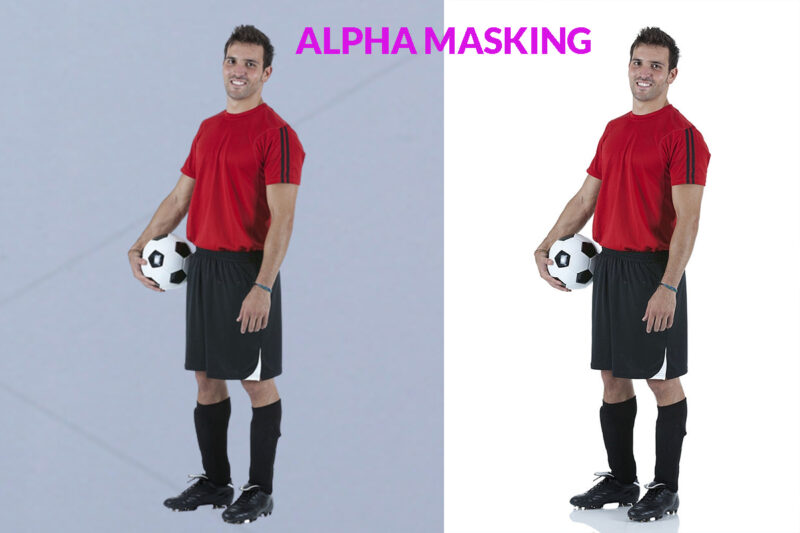
Selections are saved as greyscale images using alpha channels. An image masking technique in which you construct a channel to separate your subject is known as alpha channel masking.
When post-processing, subjects that are tough to select, such as portraits with curly hair or fuzzy animals, this type of image masking comes in handy.
When you open the channels panel, you’ll see the RGB channel that makes up your image, as well as a channel for each color – red, green, and blue.
You won’t see the image in that color when you click on one of the channels; instead, you’ll view it in greyscale. When you click on each one, you’ll notice that the contrast is varied — this will be different on each image.
Then duplicate the one with the biggest contrast between the edge of your subject and the background. For alpha channel masking, you don’t want to work in the color channel because it will change the colors of the photo.
Using the tool of your choice, increase the contrast until you can readily select the topic. After that, make a layer mask.
It’s worth noting that the mask generates its own alpha channel. However, it may be found next to the thumbnail of your image in the Layers panel, just like a standard mask.
Let’s discuss the basic process of image masking for jewelry items. They are stated as below.
- Navigate to the Channels panel, which is placed next to your layers, to create an entirely new alpha channel. If you don’t see this option, go to Window > Channels to see it.
- Select New Channel from the drop-down menu at the upper right of the Channels screen. On the pop-up window, give the channel a name.
- The brush tool can then be used by selecting it from your toolbar or pressing B on your keyboard. By subtracting from the alpha channel, you can draw areas that you’d like to pick.
- Then, at the bottom of the Channels window, select “Save selection as channel” to create a selection from your marks. You can then use any of the Adjustment tools to alter the selected region as needed.
- The alpha channel will appear as a crimson overlay with a 50% opacity. The Brush tool removes sections of the overlay to illustrate where your selection is as you use it.

3. Vector Masks on Image Masking
Vector Masking is the process of deleting undesired parts of an image. You’re frequently left with only one person or object. A new layer can then be placed beneath the masked image, transporting your person or object to a new world.
Let’s discuss vector-based masks that can be changed easily in the future by changing points and handles. Because the drawn path becomes transparent, vector masks are useful for masking holes in images.
- In Photoshop, go to File > Open and select an image.
- Double-click the layer thumbnail with the picture layer selected. The layer is no longer a Background layer when you click OK.
- Draw a closed-form within the image with the Pen tool (p key) and the tool set to Path in the tool options.
- Select the current work path in the Paths panel (Window > Paths).
- Select the layer in the Layers menu (Window > Layers). then select Layers > Vector Mask > Current Path from the drop-down menu.
- The picture layer receives a new Vector Mask. The image is shown via the mask’s white portions.
- Click the Vector Mask to bend the curve, then open the Paths panel to pick the path. To alter the route shape, use one of the Pen tools (Add Anchor Point, Delete Anchor Point or Convert Point) or the Direct Selection tool (a key).

4. Clipping Mask
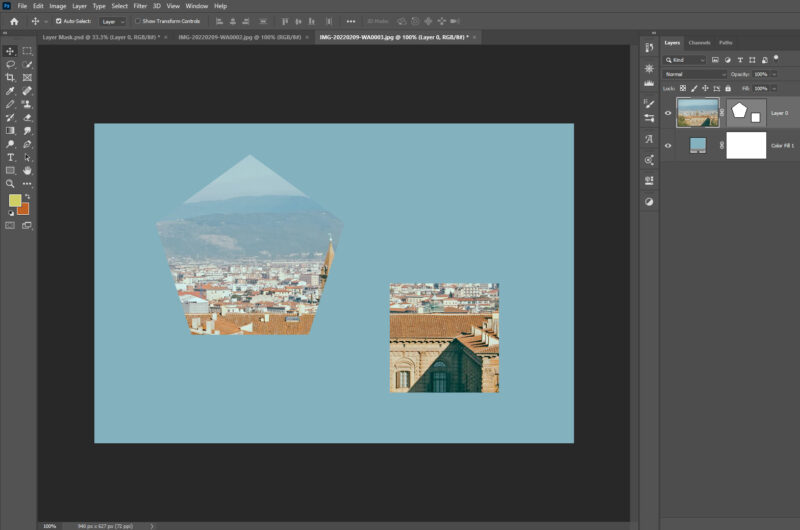
This image masking technique connects a layer to the boundaries of the layer beneath it. It’s typical to apply a clipping mask for each element when masking a Photoshop collage.
A clipping mask can also be used to keep images contained within a shape. Create a shape in one layer, then place an image on a top layer with a clipping mask.
- Arrange the layers in the Layers palette such that the masking layer is below the layers you want to mask.
- In the Layers palette, choose a layer.
- Select the Create Clipping Mask option from the Layer menu.
*Note that the clipping mask has the same features as the group’s bottom layer.

“Related Article”
Photo Retouching tools & techniques in Photoshop
5 Useful Tips for Jewelry Photo Retouching
Frequently Asked Questions (FAQs)
Question 1: What is Image Masking?
Answer: Image masking is a technique used in graphics software such as Photoshop to hide and expose parts of an image. It is a non-destructive image-altering method.
Question 2: How Image Masking can help photo editing?
Answer: Image Masking usually allows you to edit and adjust the mask later if necessary. It is frequently a more efficient and innovative method of picture manipulation services.
Question 3: How many types of Image Masking are there?
Answer: There are a few types of Image Masking. They are layer Masking, Alpha Channel Masking, Vector Masking, and Clipping Masking.
Question 4: Is it possible to masking photos on Lightroom?
Answer: Yes. It is possible to mask an image on lightroom software. Go to the Develop workspace, then pick the mask icon in the upper right-hand panel to access the masking tool. The panel in 2021 appears a little different than previous versions, with only a single circular icon replacing the linear gradient, radial gradient, and brush tools.
Conclusion
By including masks into your image editing process, you may transform a dull photograph into a captivating work of art. Image masking can also be used in graphics where images interact with words, such as on magazine covers or pamphlets.
It’s also useful for separating objects for commercial use or collages. Finally, image masking will help you take your photography to the next level.