Photo retouching is a great way to enhance the quality of your photos or image. But We all wonder about a few basic matters about photo retouching, right? Like, what is photo retouching? Why is it so important? And how to use retouching tools?
Well! In this article, I will guide you through some basics about photo retouching. So, why waste time! Let’s dive right into the discussion.

Photo Retouching by definition
The practice of enhancing the appearance of an image is referred to as “retouching.”In photography, photo retouching is the process of erasing imperfections from an image. This might be something as simple as dust or filth on the camera lens or sensor.
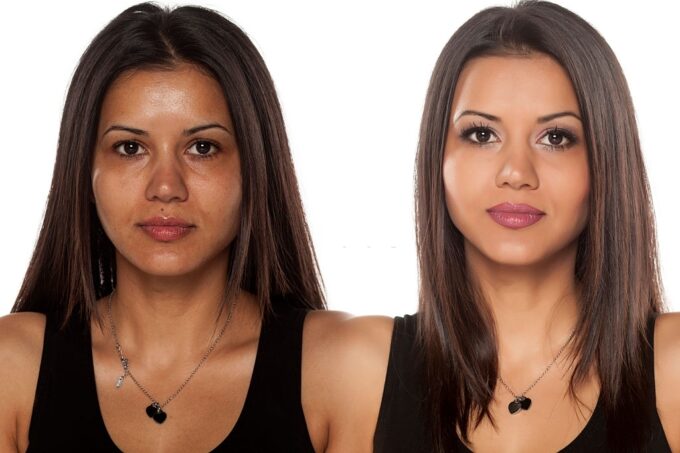
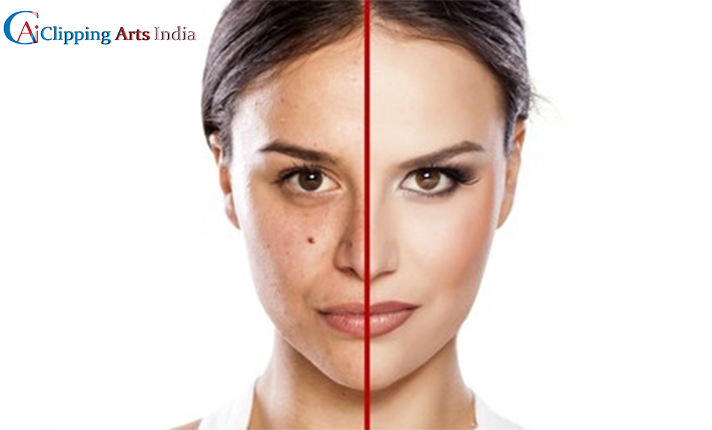
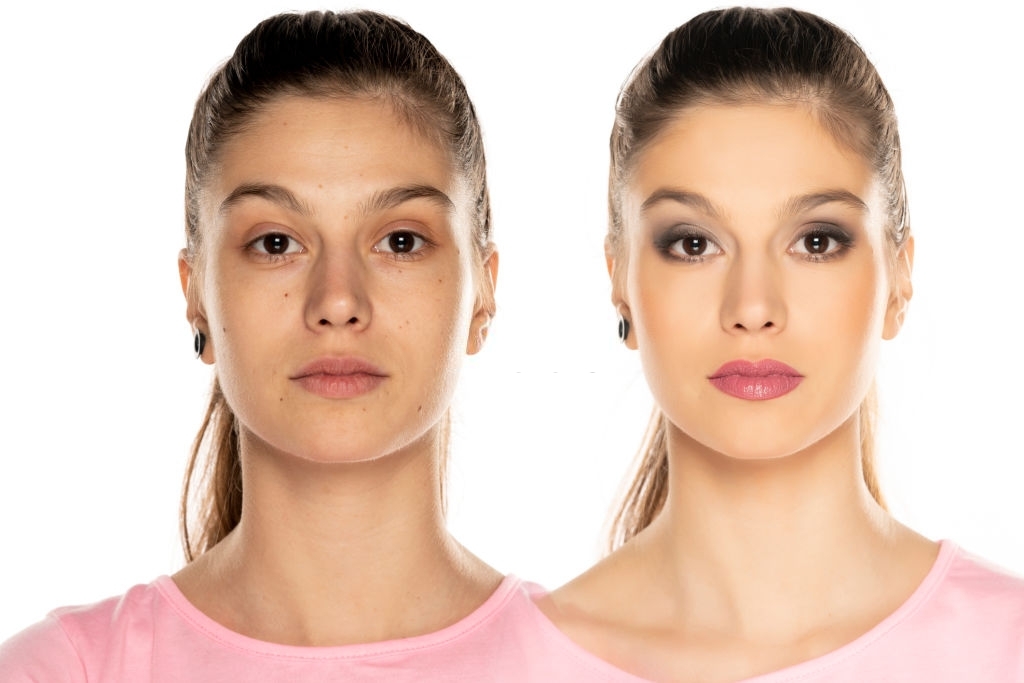
Photo Retouching can be performed to correct some physical flaws on a model’s skin, as seen in many fashion magazines. Final presentations can also benefit from this image-altering method. Making minor, localized modifications to an image is sometimes referred to as retouching.
As a result, picture retouching services are utilized to give the final image a polish. This usually happens after global adjustments like color correction, cropping, and white balance have been made.
Difference between Photo Retouching & Photo Editing
With the rising popularity of photography among casual amateurs and new enthusiasts, it’s all too easy to fall into the trap of conflating the terms “Photo retouching” and “Photo editing.” The fact remains that the meanings of these terms are vastly different from one another. Even photographers have been known to mistakenly believe they are saying the same thing.
Unless the project scope and final photographs are described clearly and unambiguously, this might lead to misunderstandings, especially between photographers and their clients.
So, what’s the difference between photo retouching and photo editing, exactly? Let’s get started.
Photo Editing
Editing a photo is usually a quick procedure that takes anywhere from a few seconds to a few minutes for each photo. This range is entirely dependent on the final image’s desired appearance. These are the previously described globalization modifications, in which lighting/exposure, color temperature, and cropping are all modified.
Apart from capturing the images, photo editing is the majority of the labor for a wedding photographer. There could be hundreds, if not thousands, of images to sort through, and the process could take hours, if not days. The amount of photos that need to be altered is determined by the size of each batch of the photos shot.
Photographers typically filter out photographs that do not make the cut before beginning the actual adjustments.Each photograph would be evaluated to see if it should be provided (and altered) to the client. This method saves the photographer time while maintaining the overall quality of the batch of photographs to be provided.
Photographers who are just starting out as professionals have a higher percentage of photographs to discard, yet the quality will improve with time and experience.This is included in the photography service so that clients don’t have to waste time sorting through photographs they don’t want. The service is assisting them in getting right to the excellent stuff.
Photo Retouching
On the other hand, Photo retouching is something a bit different. When basic changes aren’t enough, photo retouching is used. The general rule for retouching is to remove distracting elements from the photograph and perhaps improve its overall quality.
Photo retouching is the process of removing all flaws from a photograph, which commonly entails color and Changes to brightness, contrast, and saturation, as well as tone correction and the eradication of imperfections and under-eye circles Aside from that, the retouching procedure may also comprise airbrushing, which entails removing certain areas of the image. Specific features from the background or add components that were not present in the original photograph.
The Importance of Photo Retouching
In both portrait and product, photography Photo retouching is really important. Here in this section of the article we will discuss the importance of Photo Retouching. They are stated as below:
In Portrait Photography: Photo retouching plays a significant role in portrait photography. Masks could be used in the editing process in portrait photography to disguise flaws, smooth skin, and whiten teeth. The face’s width can be changed. The eyes can also be improved.
It is also possible to change the color of one’s hair. The human body can be improved.
In product photography: In product photography, photo retouching can be used to erase fingerprints or smooth the product’s surface.To add depth to the product, highlights might be used. These modifications are made to make the final image more appealing to potential buyers.
When it comes to retouching a photo, there are numerous layers to consider. On another level, retouching can be used to improve the appearance of gemstones in jewelry. Diamonds would be more defined, gold and silver would shine brighter, and leather materials would have more texture as a result of this action.
Adjustments are done according to the wishes of the clients in photo retouching services. In such circumstances, the final visuals must be consistent with the client’s logo.
Photo Retouching tools & techniques in Photoshop

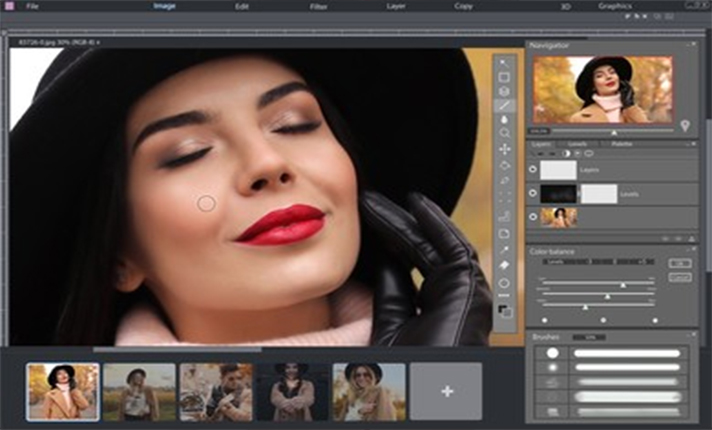
One of the most capable photo altering software tools available in Photoshop. When it comes to improving or manipulating images, the Adobe Photoshop application is extensively used by photographers.
The technique of editing or modifying images using the computer application Photoshop is known as photo retouching. This software can conduct advanced or extensive retouching. Pixel-level editing and adjusting the width of a model’s face are examples of retouching chores. Let’s discuss some of the most frequent retouching techniques below:

1. Spot Healing
Photo retouching includes professional and skilled spot healing. Many photo editing software packages have a basic main function called Spot Healing. This tool is effective for eliminating imperfections on the face or body in model photography.
To get started, photographers and editors should understand how to use this tool as soon as feasible.

2. Frequency Separation
This photo retouching feature allows you to make changes to your image’s skin texture. This tool can be used to repair the model’s skin if it appears to be too crisp or blurry.
The skin of a picture can be sharpened or blurred via frequency modification. When this tool is utilized, the editor can keep the model’s skin tone as well as the model’s skin condition.
3. Dodge & Burn
The dodge and burn tool is a quick and easy technique to change the luminance and darkness of specific areas in an image.The degree of flexibility afforded by utilizing this tool contributes a lot to the photo editing process, despite the fact that it merely modifies the brightness and darkness.
The image that results can be of much greater quality. However, you should use the dodge and burn tool sparingly, as too much of it will degrade the overall quality of your photographs and make them appear strange.
4. Eye Retouching
The editor will always be working with photographs of models in model photography. As a result, eye retouching is a well-known technique.
This procedure may include the elimination of eye bags, changing the color of the eyes, and adjusting the shadows in the eyes. Because human attraction is based on the model’s eyes, successful efforts to improve the model’s eyes would improve the image overall.
5. Color Balance, Levels, and Hue/Saturation
Toning is a type of color filter. It can be used to influence how the viewer of the image feels about the final image in a variety of ways.A friendlier and more inviting tone would be used, whilst a cooler tone would be used to create a more remote environment.
This instrument necessitates delicacy and restraint. Once an editor has mastered this tool, it will make a significant difference in the quality of the images they generate.
6. Resizing
The resizing tool is another easy tool that is frequently overlooked. Many people consider this to be a fairly simple tool because almost every photographer and editor is familiar with it.
7. Healing Brush Tool
This photo retouching tool should never be overlooked since it allows the surplus regions of an image to be cropped off using the rule of thirds/golden ratio. The practice of leaving things out is known as the art of leaving things out. An excellent work of photography, drawing or any other kind of art does not waste time in communicating with its audience.
It is direct, and it normally takes five seconds to get the audience’s attention. As a result, it’s critical for any shot to have only what it needs to communicate and leave the rest out.
Some Image Retouching Tips for the Beginner
When you are about to do photo retouching you have to keep in mind some basic tips. Here in this section of this article, we will discuss some tips, especially for a beginner.
1. Straightening the Horizon
As a professional photographer, you may have noticed that many landscapes and building photographs have a skewed horizon line. A slanted horizon indicates negligent editing unless there is a creative reason for it.
What is the most effective way to resolve this problem?
Look for something horizontal (like the ocean or a road) or upright (like a tree) in your photo (light post, vertical structure). Using these objects as a reference, use the Rotate tool, which is accessible in most (if not all) editing software (including the one on your phone).
2. Crop the Frame Accordingly
Not every photograph you take will be well-framed or arranged. If you’re not sure, shoot a little wider than the final frame when capturing the scene. Figure out what your photo’s focus and/or subject must be in post-production. Cropping will then be carried out as a result of this.
Retain in mind that while straightening a photo (prior tip), a crop will occur naturally to keep the photo’s rectangle (or square) crop!!
3. Reduce the Noise
Begin by asserting that there are various methods for reducing excessive grain or noise in an image. Because these are quick, one-minute tips, I recommend trying the way described afterwards.
When a photograph is taken in low-light settings, the speckles, spots, and grains that appear in the image are known as noise. This is most noticeable in images taken in the evening or at night.
Go to Filter > Noise > Reduce Noise in Photoshop. After using the ‘Reduce Noise’ tool, here is the before and after image.NOTE: Until you can zoom in to 1:1, it’s difficult to see the difference in noise in the before and after photographs.
4. Remove unwanted Spots
The Spot Healing Brush tool in Photoshop makes removing spots or face blemishes simple.
To get to it, go to the left side panel of Photoshop and look for the band-aid icon (or continue pressing Shift-J till it is selected). By pressing the left and right square bracket keys, you may adjust the brush size until it covers the region you want to repair. Select the imperfection or dust spot by clicking on it. And presto, the location has vanished!
5. Eliminating the distractions
You take a lovely shot of a structure, only to discover that it has been marred by a lamppost (which you couldn’t possibly avoid). Your shot would be a lot better if they weren’t there, but how can you get rid of them?
There are a couple of tools in Photoshop that are specifically built for this. These are the results of using the ‘Patch Tool’ using the ‘Content Aware Move’ patch method. Shift-J until the tool you want appears, as in the prior suggestion. Then, by drawing a circle around the distracting piece, move it out. The remainder is handled using Photoshop.
There are a few things to bear in mind:
- By moving the selection to a clean region, the patch tool replaces the specified area/s.
- After you’ve chosen the Patch Tool, ensure the Patch type is set to ‘Content-Aware’ (instead of normal)
- If there’s a larger distraction in the frame that you wish to remove, you could want to draw around smaller selections.
6. Make the image a black-and-white affair (Desaturation)
If you think a photograph you’ve shot is dull, don’t delete it. Convert it to black-and-white. To put it another way, you’ll have to desaturate (delete) the colors. It’s possible that you’ll need to boost the contrast (as described in tip #3). You might be astonished at how many photographs you can save if you do it this way. Desaturating an image can be done in two methods.
- Change the ‘mode’ of the image to ‘Grayscale’ [Image > Mode > Grayscale]
- Adjust the saturation of the image [Image > Adjustment > Hue/Saturation]
7. Reducing the Red Eye
Have you ever used a flash to photograph people or a person at night (or in a dark place) only to be met with ‘devil eyes’? A person or a group of persons with bright red eyes!
What causes this to happen? Our pupils open to see more in low light at night or in a dark environment. When a flash is employed in this condition, the light entering the pupil is reflected back by the retina, resulting in what we call red-eye.
Please note that this is not one of my photographs. I’m sure I have some photographs with red-eye, but I didn’t have time to look for one in time for this video. That is why I am utilizing an image that I discovered online.
To use the Red Eye Tool in Photoshop, go to the toolbar and choose it (or press Shift-J until it appears), then drag from the leading left edge of the eye to the bottom right. That is all there is to it. This is a five-second answer in essence.
8. Sharp the Image
Unlike most people’s perceptions of sharpening, I sharpen my photographs after I’ve finished fixing or enhancing the details. It’s the very last thing I do. Unsharp Mask is the best tool in Photoshop for sharpening photos. In Photoshop, go to Filters > Sharpen > Unsharp Mask to discover this tool.
A set of sliders appears in the resulting pop-up window. I recommend experimenting with the ‘Amount’ and ‘Radius’ sliders. It’s entirely up to you. But keep in mind that sharpening too much can lead to oversharpening. It will make the image appear phony or ‘crunchy.’ After you’ve made a modification, make sure to toggle the preview checkbox on and off to see the before and after results.
Conclusion
In the end, we can say that photo retouching is a crucial part of photographic post-production.
You can either spend time in Photoshop, the most extensively used and debated photo altering software (see these Photoshop overlays), or look for less expensive or free software for a more budget-friendly photo retouching tool.
Retouching photos takes a lot of practice, but if you put in enough time and effort, you can produce high-quality images that can land you clients and, if you’re lucky, international photography competitions.


