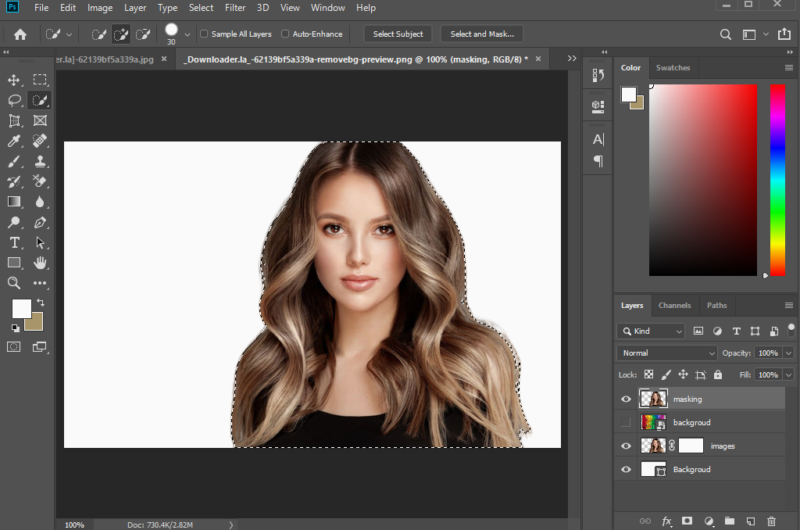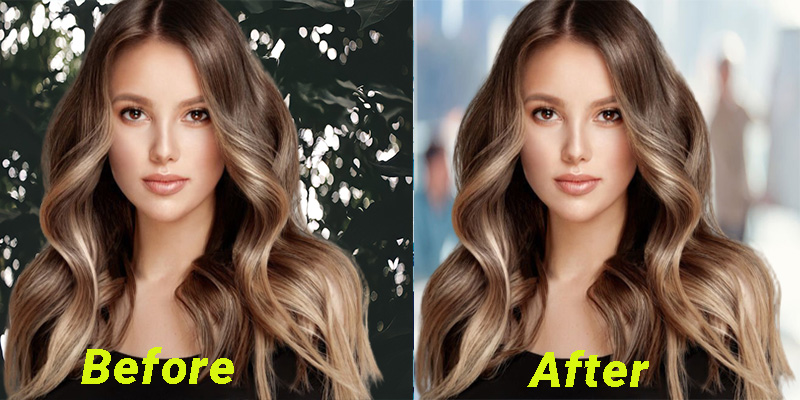
Different types of masking in Photoshop:
So what are layer masks then? If the term “mask” is perplexing you (and who can blame you), try replacing it with “transparency,” because that’s exactly what a layer mask accomplishes. It allows you to adjust the transparency of a layer. Layer masking and Clipping masking are two types of masking techniques available in Photoshop.
These can be elaborated into five more types of masking. These are Pixel Masks, Vector Masks, Quick Masks, Clipping Masks, and Clipping Paths.
One of Photoshop’s most useful features is layer masks. Understanding the power of layer masks is the first step toward Photoshop mastery. To understand the whole concept better, just imagine what a mask does in real life. Masks can be used to hide or reveal what is underneath. Similarly, when you wear a mask, you virtually manage your visibility, or how much of yourself you reveal. Masks in Photoshop operate in the same way. A layer mask is used to adjust the transparency of a layer. In grayscale, it can only have monochromatic colours, such as white, black, and different shades of grey in between. Using a layer mask on top of a picture, you may control how much of it is seen.
On the other hand, clipping masks function similarly to layer masks, with the exception that they lack the monochromatic grayscale colour range. They instead use the transparency of the layer beneath them.

Pixel Mask: Pixel masks calculate opacity values based on a raster image with grayscale values that match the original layer pixel for pixel. As a result, they are ideal for masking complex photographic imagery,
For example, the hair on a model or leaves on a tree. Pixel masks support 100 different shades of grey, which correspond to opacity percentages. Pixel masks are unique in their ability to vary opacities, making them an invaluable tool. While pixel masks are simple to modify, they aren’t suitable for all situations.
Scaling them can result in undesirable artifacts and interpolated blurriness due to their raster format. When painting a mask, smooth curves and flawless borders might be difficult to achieve. Vector masks might be preferred in this situation.
Vector Mask: Vector masks fill in the gaps where pixel masks leave off. By defining the mask’s shape with paths, vector masks enable a higher level of refinement and versatility. They’re great for defining shapes with clean, crisp lines, like interface elements.
Vector masks have the drawback of being unable to alter pixel opacities; they are generally either 0 or 100. As a result, many masking jobs necessitate a mixed approach. You may effectively extract objects while increasing flexibility by utilizing a vector mask to create solid boundaries and a pixel mask for more intricate areas or varied opacities.
Quick Mask: Now, instead of using basic selection tools, the Quick Mask mode allows you to construct a selection using pixel editing tools. This is a more sensible way to make a complicated mask with changing opacity.
Press Q or select the “Quick Mask” button in the Tools bar to enter this mode. You won’t be able to alter the current layer once you’ve switched to Quick Mask mode. Instead, you’ll be working with a Ruby overlay that you may manipulate like regular pixel data. By default, entering this mode will apply a semi-transparent red hue to the whole canvas.
The overlay can then be removed with white paint and replaced with black paint. The Quick Mask is a more visual representation of a selection. As a result, every area removed from the overlay is added to the selection.
Clipping Mask: You’ll frequently find yourself in scenarios where many levels require the same mask. It’s possible to group the layers and mask the layer group, although this isn’t always the best option. By using clipping masks, a layer can simply adopt the opacity of an underlying layer.
When working with adjustment layers, clipping them to a layer allows you to make adjustments to a single layer without impacting others below it. You’ll frequently find yourself in scenarios where many levels require the same mask. It’s possible to group the layers and mask the layer group, although this isn’t always the best option.
By using clipping masks, a layer can simply adopt the opacity of an underlying layer. When working with adjustment layers, clipping them to a layer allows you to make adjustments to a single layer without impacting others below it.
Conclusion
Finally, we would like to mention the clipping path and end your long but informative read here. Clipping Paths are similar to Vector Masks in that they apply to the entire document rather than a single layer or layer group. Print designers primarily use them to specify uniquely shaped objects that are imported into a page layout program.
To ensure a crisp clean edge, the path is imported alongside the image. Now, to make a clipping path, you must first have a saved path; a temporary Work Path will not suffice. If your path isn’t saved, go to the Paths palette’s fly-out menu and select “Save Path.” Then select “Clipping Path” from the fly-out menu. The appearance of your document will not change, but it will be clipped to the path if you import it into Illustrator using the Place command.